Here's something that
might, or might not, be of interest. Briefly, our pal Ger Duhig --
you might know him,
http://www.realclassic.co.uk/jawa_350_%20classic.html,
had bought a no-name Chinese GPS last year for about €160 and
remains very pleased with it. Samsung processor, all the right sort
of internal kit, just like the branded ones apart from the
no-branding. I wanted one, as I've got no sense of direction. Ger's
UK supplier had gone AWOL, but Ger found me another,
http://www.the-electronics-genie.co.uk/geniestore/ in
Stockton-on-Tees. Fine, so I bought one for me and one for Frank
Swords (Pan European ST 1300 man, whom you probably know from our
rallies, and who has no credit cards!).
The hardware came by
DHL within two days of dispatch. That's two days to Bray from
Shenzhen, China!
Installing the mapware
off the separately-supplied CD was easy enough but refining it for
the 4.3" screen size was a little beyond me, so I got Frank
Swords' son Greg -- an absolute genius, he runs his own computer
business -- to spend ten minutes sorting it out.
Fine ... but how to fit
the mounting bracket to the Skorpion? The factory has a lot to answer
for in my opinion, fitting those oh-so-clever Paolo Tarozzi bars.
Anyway, it had happened that just before Christmas my gas central
heating "boiler" had gone belly-up, so I needed a new one
really quickly. Just what I needed five days before Christmas, a bill
for €1,800! But in the process the installer had managed to omit
carrying off a few offcuts of (roughly) 22mm o/d copper tube.
These bits struck me as potentially useful. I rarely throw anything
away and so have a house full of junk, a fact that alone would
disqualify me from Good Housekeeping awards.
To begin with, I
soldered two 8mm i/d washers inside one end of a short section of
copper tube (photo #2). In the other end, I cut off a
separate copper-tube section, reduced the diameter till it would
fit inside the main tube, and soldered it inside that tube (photo
#3). Then I sliced the end off the redundant bar-end weight (I'd
discarded those weights earlier, having fitted Halcyon stainless
bar-end mirrors instead). The washers and copper insert weren't to
add strength, merely to locate the tube in place on the handlebar.
See photo #1 for all the components. (The small metal piece at lower
right is a chunk I'd needed to hacksaw off the old bar-end fitting.)
For soldering I used plumber's solder and Fry's Powerflow Flux, and a
small butane blowtorch for heating. Definitely not a job for my usual
cored solder and a 25W Weller electric soldering iron!
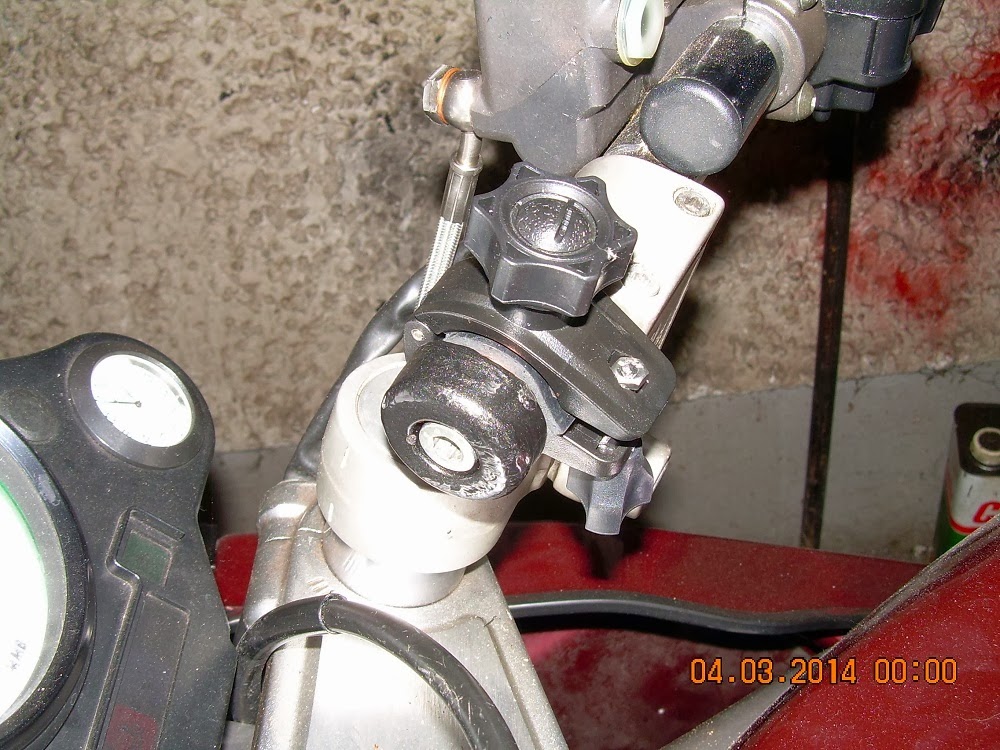
The remaining photos
show the installation in place.


Nice work Pat.
ReplyDelete